|
||
|
Month: February 2013
Apache无法启动的解决办法
刚刚有客户反应网站无法打开,进服务器看了下,原来HTTPD死掉了,尝试service httpd restart但无法启动,检查/var/log/httpd/error.log后发现这个错误有很多条:
[Thu Feb 14 11:04:02 2013] [error] (17)File exists: Cannot create SSLMutex with file `/var/log/httpd/ssl_mutex’
于是rm -rf ssl_mutex,然后再尝试重启httpd,问题解决!
网页提示“证书错误:导航已阻止”,无法跳转解决办法。
在访问公司内网的时候,出现如图所示的提示,显示“证书错误:导航已阻止”,点击“继续浏览此网站”后没反应,无法跳转。
经研究发现,是微软在其一个补丁当中对证书的密钥长度做了限制,长度小于128bit(位)的密钥将被阻止而无法继续运行。当然,这是对用户安全的考虑。但是对于完全信任的密钥长度小于128bit的证书,我们还是需要用的。这里,微软也给出了解决办法。
微软补丁名称:KB2661254
参考页面:http://support.microsoft.com/kb/2661254
解决办法:
1、在添加删除程序中查找KB2661254这个补丁,卸载即可。
2、以管理员身份运行一下命令:
certutil -setreg chain\minRSAPubKeyBitLength 512
//允许的最小 RSA 密钥长度为 512
certutil -setreg chain\EnableWeakSignatureFlags 2
//启用密钥长度少于 1024 位的 RSA 根证书
注:在win8系统中并没有这个补丁,是直接集成在系统中的,可用方法2直接设置即可。
转于http://blog.163.com/whhlcj@126/blog/static/387028772012111853842496/
iPhone5/iPad Mini完美越狱工具下载及越狱步骤
iPhone 5/iPad Mini完美越狱工具终于于北京时间2月5日凌晨1点左右正式放出了!短短几分钟官网下载链接就被点爆无法下载,请点击文章微博的镜像地址下载越狱工具!
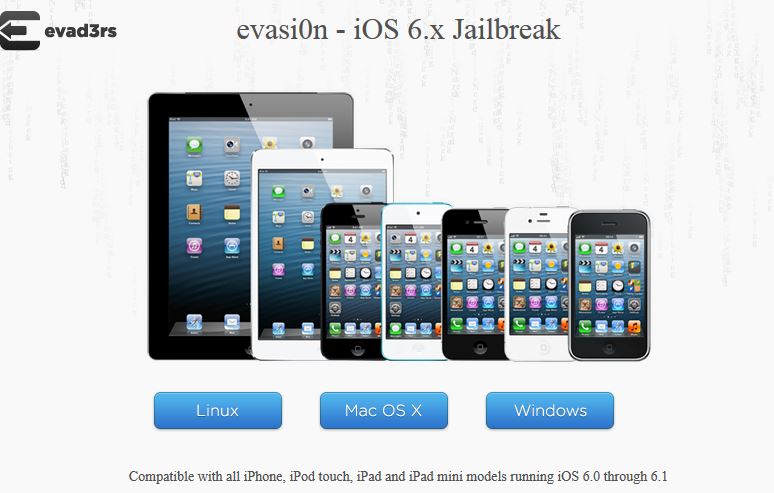
基本需求:
5 分钟的时间。
搭载 iOS 6.0 或 6.1 的苹果设备和数据线。
配备 USB 接口的 Windows / Mac OS X / Linux 计算机。
注意事项:
备份您的 iOS 设备,确保不会丢失数据。
取消您的设备密码,这可能会导致问题。
耐心等待,不要开启 iTunes 或 Xcode。
如果出现卡死情况,直接重启程序 / 设备。
其他建议:
抢先下载最新固件,以便恢复 / 升级设备。
注意备份 SHSH,以防苹果关闭验证(谁知道会不会推出 iOS 6.11 呢?)。
访问evasi0n团队官网:evasi0n – iOS 6.x Jailbreak
注:文章部分内容转载自CNBETA
更多镜像地址
| Server | OS | Link |
|---|---|---|
| box.net | Linux | SHA1: c9e4b15a161b89f0e412721f471c5f8559b6054f |
| Mac OS X | SHA1: 23f99a0d65e71fd79ff072b227f0ecb176f0ffa8 | |
| Windows | SHA1: 2ff288e1798b4711020e9dd7f26480e57704d8b2 | |
| MEGA | Linux | SHA1: c9e4b15a161b89f0e412721f471c5f8559b6054f |
| Mac OS X | SHA1: 23f99a0d65e71fd79ff072b227f0ecb176f0ffa8 | |
| Windows | SHA1: 2ff288e1798b4711020e9dd7f26480e57704d8b2 | |
| RapidShare | Linux | SHA1: c9e4b15a161b89f0e412721f471c5f8559b6054f |
| Mac OS X | SHA1: 23f99a0d65e71fd79ff072b227f0ecb176f0ffa8 | |
| Windows | SHA1: 2ff288e1798b4711020e9dd7f26480e57704d8b2 |
How To Get Started with CentOS Minimal
I wanted to share with everyone a little post about my exposure to CentOS 6.2 Minimal. If you are not aware with the latest release of CentOS 6.2 there is now a “Minimal” ISO option. Now let me tell you first off when they say minimal….it’s got next to nothing. Personally, I love that fact because there is zero bloat to it. If you are an admin or even a developer working on virtual appliances, this could be the solution for you.
I decided to use it to build my own vCloud Catalog image on Virtacore so I could deploy it and use it for my Bitnami wordpress stack install. I have always been a fan of CentOS for my home lab and this release is no exception now that it is just so darn small. The ISO is a mere 322mb and installs all of 209 packages to get you started.
The first thing to note is that it is so miminal you do not even have network connectivity. That is the first thing you have to deal with so you can install other packages. This is easy to do by just editing the /etc/sysconfig/network-scripts/ifcfg-eth0 file for DHCP or the IP information of choice. Then you will be good to go to install more packages. Also be sure to add ONBOOT=YES or you will have to start the networking each time you boot. So the key files you will need to edit are:
/etc/sysconfig/network-scripts/ifcfg-eth0
/etc/hosts
/etc/resolv.conf
Now off the bat here is a short list of things you will want to add on right away especially if you want to install the VMware tools on your new operating system. I assume you do since everyone uses Virtualization, right?
wget
sudo
postfix or sendmail
nano
system-config-network-tui
perl
kernel-headers
make
gcc
ntp
As you can see even these are some of the most basic packages needed. Now you can begin to add all the other packages you want until you have the build you desire. For VMware tools, the kernel does not need to be built during the install, but it is force of habit to install the headers, gcc, and make. The only thing I found was you can use this image in vCloud Director with guest customization, but I have not found a way for vSphere to do Guest Customization from a vCenter template. vCloud uses a different method and CentOS is supported in vSphere, so I need to look into that more.
So I am in the process of re-building anything linux in my home lab to CentOS Minimal and I would tell you to give it a shot too. Especially if you like un-bloated installs to start with. Makes it a bit more work, but thanks to the vCloud Director catalogs you can do it once and provide it as an option to your consumers. I think you will like this new offering for sure.
Step by Step install of CentOS 6.3 on Microsoft Hyper-V Server with Linux Integration Services Version 3.4
Create new VHD w/ Legacy Network Adapter for CentOS 6.3
Download CentOS 6.3-minimal.iso (insert disk & install)
Download LinuxICv34.iso (insert disk)
mkdir -p /mnt/cdrom
mount /dev/cdrom /mnt/cdrom
cp -rp /mnt/cdrom /opt/linux_ic
umount /mnt/cdrom
cd /opt/linux_ic/RHEL63
./install.sh
Once the install is down, shutdown the VPS, note the mac address and then remove the legacy adapter.
Add a standard network adapter with static mac previously noted. apply and restart the VPS
Update your network settings via vi
vi /etc/sysconfig/network-scripts/ifcfg-eth0
use “i” to insert text, (esc) to exit and “:wq” to write your changes.
IT should look something like this:
DEVICE=”eth0″
BOOTPROTO=none
ONBOOT=”yes”
TYPE=”Ethernet”
HWADDR=(MAC ADDRESS, This should match what is configured in Hyper-V)
IPADDR=(YOUR SERVER IP)
GATEWAY=(YOUR DEFAULT GATEWAY)
DNS1=(PRIMARY DNS SERVER IP)
DNS2=(SECONDARY DNS SERVER IP)
If your system is still not online for static IP do this:
Networking=yes
ifconfig eth0 (IP) (MASK) up
重新放出黑客帝国欢迎动画
今天花了点时间把前几年做的一个黑客帝国欢迎动画适当修改了下,放到了博客上。
点击下面的按钮播放动画: