Set up SSH keys – avoid typing password every time

On the local machine, type the BOLD part. The non-bold part is what you might see as output or prompt.

  • Step 1:
    % ssh-keygen -t dsa
    Generating public/private dsa key pair.
    Enter file in which to save the key (~/.ssh/id_dsa):
    (just type return)
    Enter passphrase (empty for no passphrase):
    (just type return)
    Enter same passphrase again:
    (just type return)
    Your identification has been saved in ~/.ssh/id_dsa
    Your public key has been saved in ~/.ssh/id_dsa.pub
    The key fingerprint is:
    Some really long string
    %
  • Step 2:
    Then, paste the content of the local ~/.ssh/id_dsa.pub file into the file ~/.ssh/authorized_keys on the remote host.
  • RSA instead of DSA
    • If you want something strong, you could try
      % ssh-keygen -t rsa -b 4096
    • Instead of the names id_dsa and id_dsa.pub, it will be id_rsa and id_rsa.pub , etc.
    • The rest of the steps are identical.

That’s it!

FAQ:

  • Q: I follow the exact steps, but ssh still ask me for my password!
  • A: Check your remote .ssh directory. It should have only your own read/write/access permission (octal 700)
    % chmod 700 ~/.ssh

Source: http://www.ece.uci.edu/~chou/ssh-key.html
解决rTorrent下载中文资源文件名乱码的问题

解决办法:

1. 修改rTorrent配置文件,我的配置文件位置是在 /opt/etc/rtorrent.conf ,在最后一行加上一句: encoding_list = zh_CN.UTF-8

这个并没有解决我的问题,文件名依然乱码,后来查资料才发现需要改挂载参数。

2. 因为我是SAMBA挂载的NAS,在挂载的时候需要加一个参数iocharset=utf8: mount -t cifs //192.168.1.2/ShawnHDD /tmp/ -o rw,iocharset=utf8,username=shawn,passwo rd=password

参考资料:http://ubuntuforums.org/showthread.php?t=288534

PPTPD源码安装 Install PPTPD from source code

今天花了一晚上倒腾VPN服务器,因为是用的CENTOS,没法直接apt-get install pptpd,虽然网上有RPM包,但最后还是选择了源码安装,过程中碰到很多问题,在此总结一下:

1. make install后默认没有安装服务,需要自行创建/etc/rc.d/init.d/pptpd,写入代码如下:

#!/bin/sh
#
# Startup script for pptpd
#
# chkconfig: 345 85 15
# description: PPTP server
# processname: pptpd
# config: /etc/pptpd.conf

# Source function library.
. /etc/rc.d/init.d/functions
# See how we were called.
case "$1" in
start)
echo -n "Starting pptpd: "
if [ -f /var/lock/subsys/pptpd ] ; then
echo
exit 1
fi

daemon /usr/local/sbin/pptpd
echo
touch /var/lock/subsys/pptpd
;;
stop)
echo -n "Shutting down pptpd: "
killproc pptpd
echo
rm -f /var/lock/subsys/pptpd
;;
status)
status pptpd
;;
restart)
$0 stop
$0 start
;;
*)
echo "Usage: $0 {start|stop|restart|status}"
exit 1
esac

exit 0

2. 将pptpd安装为服务并随机启动:

chkconfig --add pptpd
chkconfig pptpd on
service pptpd start

3. 客户端链接的时候很可能提示错误,这是因为通过yum install ppp安装的组件版本与pptpd所支持的版本不一致,解决办法,修改/etc/pptpd.options,注释掉logwtmp即可。这个问题折磨我好久!=-=!

4. 还有一个很折腾人的问题,就是连上VPN后无法访问外网只能访问VPN服务器,原因是要通过iptables转发数据包才行,代码如下:

iptables -t nat -A POSTROUTING -o eth0 -j MASQUERADE
//add it to /etc/rc.d/rc.local for auto execution when rebooted.

5. 附上具体安装步骤:

//install ppp 
yum install ppp

//install pptpd, download source code and
./configure
make
make install

// update pptpd configurations in file /etc/pptpd.conf:
localip     192.168.9.1
remoteip    192.168.9.11-30

// /etc/ppp/options.pptpd:
ms-dns    8.8.8.8
ms-dns    8.8.4.4

// /etc/ppp/chap-secrets. Each line in the file has the format:
<username> pptpd <passwd> *

// /etc/sysctl.conf, use the following config:
net.ipv4.ip_forward = 1


EMACS快速入门

简介
emacs 是Unix上的编辑器佼佼者,在命令列上打个”emacs”就好了,一上来只是提示,
你要先开个新档并且给档名才会到这个档的编辑缓冲区(buffer)。另外如果不想用 window模式,例如有时网络很慢,或者没有X的显示允许权,可以用emacs -nw启动 terminal模式。
其实在X下他也有选单(menu)可以用,不需要背命令,背那些热键(Hotkey),虽然我 有一些朋友就这样用,不过我还是要说这样无法发挥他应有的功能。由于来往两个 模式太麻烦,所以我们有热键这个东西,在文字输入模式下,按个热键就可以完成 一些需要打入命令的事情来。热键多用几次,其实就也忘不了了。
有些键其实初学者已经不需要记了,例如往左往右这种键,这是为了有些键盘没 有上下左右Page up/Page down等等。当然玩的越熟,你才会喜欢往左往右一些用 Ctrl组合成的键。因为你的手指一直在asdfjkl;上面。
基本热键
这边先列出常用的基本热键﹔
档案
C-x C-c :离开 emacs
C-x C-f :开档
C-x C-s :存档
C-x C-w :另存新檔

光标移动:
C-a :移到行首
C-e :移到行尾
M-f :向后移一个字
M-b :向前移一个字
HOME :移到档头
END :移到檔尾
M-m :移到这行第一个字符

常用的键
M-x :执行一个emacs命令
C-g :离开一个emacs命令
C-_ :UNDO
C-s :搜寻  一直按一直往下找
M-% :搜寻与替代(按!全部换掉,要不,会一个一个问按y/n回答)
M-C-s :regular express 搜寻

M-DEL :往前砍个字
M-d :往后砍个字
C-k :砍掉游标后所有字
M-t :转换两字
C-x C-t :转换两行

区块: 一般说来在X 窗口下,我们可以用鼠标就可以标示文字了, 但是在X下面我们不用copy/paste了,只要用鼠标左键标好,然后用鼠标中 键就可以paste了。emacs的区块没有所谓的column mode的区块。
C-SPCE = C-@ :开始区块标示,然后移动光标
:如果想看到反白请先下emacs 命令”transient-mark-mode”
:但如果用了这个,鼠标的左键标示就看不到反白了喔。
C-x h :标示整个编辑区(就是整个档案)
C-w :砍掉标示的区块(用鼠标右键按两下或按del – 这个要20版以上的才有)
C-y :把刚刚砍掉的或在区块中的文字回存(也可以用鼠标中键)

多档与多窗
C-x 5 2 :开一个新窗子在新的frame
C-x 3 :开新垂直窗子在同一个frame
C-x 1 :只留一个窗子
C-x o :改到其它(other)窗子
C-x b :改到其它buffer(编辑区)
C-x k :kill掉目前编辑区
C-x C-b :列出所有编辑档案

基本宏
C-x ( :开始纪录你所按的键
C-x ) :结束你所纪录的键
C-x e :执行刚刚纪录的所有组合按键
M-n C-x e :执行n遍刚刚的按键

TAB :对齐indent
M-C- :对区块做一次程序的对齐(indent)

TAB的奥妙
其实TAB在命令缓冲区(叫minibuffer,不过不管在vi还是emacs,我们不要局限于 那些专有名词,只要捉住要领,就好像vi里面文字模式叫insert mode,不用刻意 去记)有非常多的好用,例如忘了某个命令或档名,只要多打几下TAB他就会秀出 可能的所有命令与档名。试试看先按M-x进入命令缓冲区,打个open-file,这个 就是上面热键的C-x C-f,然后按TAB键。开档其实也可以不给档名,直接按”.” 就会秀出目前目录的所有文件,按老鼠中键去选择。
emacs设定档
$HOME/.emacs是emacs 的设定档,它其实是像一种宏程序(虽然它不是), emacs读这些文稿式的程序,来做一些设定,所以其实强大的emacs是由一些已经 针对一些需求写好的一堆文稿程序所组成。这种script其实是一种叫Lisp的程序。 如果有用过pe2的人应该会记得你可以改编一些功能在pe2.pro。这个LISP在 emacs里面也有这样的功能,只是更为强大。强大到可以拿emacs来写mail,读 news,做版本控制等等。因为他也有定义变量,循环,条件等等功能。在 /usr/share/emacs/version/下面有一些伴随emacs的.el档,就是这些档案让emacs 变成无敌超人的。通常你是看到一些*.elc档案,这些是所谓的emacs byte-code檔 ,emacs内部有个compiler可以将.el档编译成.elc档,跑起来比较快。通常安装 时只会安装elc檔而已了。emacs在每次启动时会自动读你的.emacs檔。 以下我们会来试着设定一些emacs内定的一些变量命令让他有些生命。

3 ways of appending string to char

Solution 1: sprintf


/* sprintf example */
#include <stdio.h>

int main ()
{
  char buffer [50];
  int n, a=5, b=3;
  n=sprintf (buffer, "%d plus %d is %d", a, b, a+b);
  printf ("[%s] is a string %d chars long\n",buffer,n);
  return 0;
}

Solution 2: asprintf

/* asprintf example */
#include <stdio.h>

int main ()
{
  char buffer [50];
  int a=5, b=3;
  n=asprintf (&buffer, "%d plus %d is %d", a, b);
  printf ("[%s] is a string\n",buffer);
  return 0;
}


Solution 3:

/* sprintf example */
#include <stdio.h>

int main ()
{
  char buffer [50];
  int n, a=5, b=3;
  n=sprintf (buffer, "%d plus %d is %d", a, b, a+b);
  printf ("[%s] is a string %d chars long\n",buffer,n);
  return 0;
}


ERST: Failed to get Error Log Address Range

Question
I noticed X8 DP series motherboard showing “ERST: Failed to get Error Log Address Range” message during the RHEL/CentOS 6.2,6.3 version while booting. What is this problem related to?
Answer
For “ERST: Failed to get Error Log Address Range” this type of event message, you can do one of following items to get workaround. 
1. Disable ACPI with command “acpi=off” in boot grub 
2. Disable WHEA option from enable to disable in BIOS setup menu 
The reason is WHEA requesting ACPI 4.0 table support. Recently, X8 DP series do not support ACPI 4.0 feature (only ACPI 3.0). This is why you will see this warming message shown up during OS boot.

Apache无法启动的解决办法

刚刚有客户反应网站无法打开,进服务器看了下,原来HTTPD死掉了,尝试service httpd restart但无法启动,检查/var/log/httpd/error.log后发现这个错误有很多条:
[Thu Feb 14 11:04:02 2013] [error] (17)File exists: Cannot create SSLMutex with file `/var/log/httpd/ssl_mutex’
于是rm -rf ssl_mutex,然后再尝试重启httpd,问题解决!

网页提示“证书错误:导航已阻止”,无法跳转解决办法。

在访问公司内网的时候,出现如图所示的提示,显示“证书错误:导航已阻止”,点击“继续浏览此网站”后没反应,无法跳转。

经研究发现,是微软在其一个补丁当中对证书的密钥长度做了限制,长度小于128bit(位)的密钥将被阻止而无法继续运行。当然,这是对用户安全的考虑。但是对于完全信任的密钥长度小于128bit的证书,我们还是需要用的。这里,微软也给出了解决办法。

微软补丁名称:KB2661254

参考页面:http://support.microsoft.com/kb/2661254

解决办法:

1、在添加删除程序中查找KB2661254这个补丁,卸载即可。

2、以管理员身份运行一下命令:

certutil -setreg chain\minRSAPubKeyBitLength 512

//允许的最小 RSA 密钥长度为 512

certutil -setreg chain\EnableWeakSignatureFlags 2

//启用密钥长度少于 1024 位的 RSA 根证书

注:在win8系统中并没有这个补丁,是直接集成在系统中的,可用方法2直接设置即可。

转于http://blog.163.com/whhlcj@126/blog/static/387028772012111853842496/

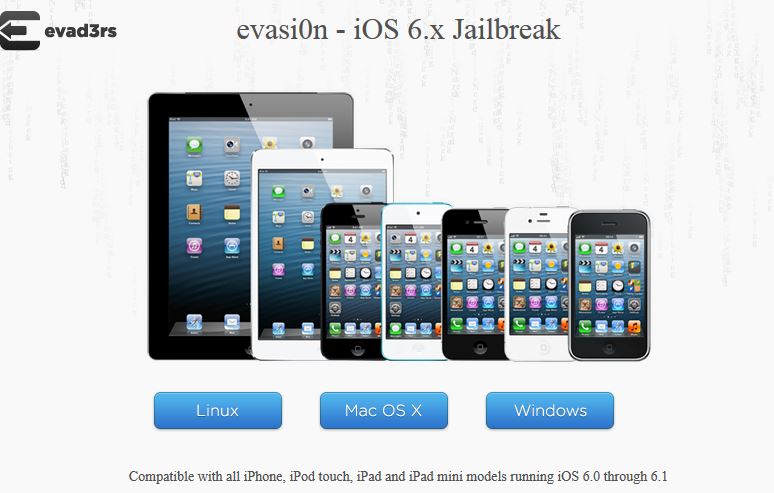
iPhone5/iPad Mini完美越狱工具下载及越狱步骤

iPhone 5/iPad Mini完美越狱工具终于于北京时间2月5日凌晨1点左右正式放出了!短短几分钟官网下载链接就被点爆无法下载,请点击文章微博的镜像地址下载越狱工具!

基本需求:
5 分钟的时间。
搭载 iOS 6.0 或 6.1 的苹果设备和数据线。
配备 USB 接口的 Windows / Mac OS X / Linux 计算机。

注意事项:
备份您的 iOS 设备,确保不会丢失数据。
取消您的设备密码,这可能会导致问题。
耐心等待,不要开启 iTunes 或 Xcode。
如果出现卡死情况,直接重启程序 / 设备。

其他建议:
抢先下载最新固件,以便恢复 / 升级设备。
注意备份 SHSH,以防苹果关闭验证(谁知道会不会推出 iOS 6.11 呢?)。

访问evasi0n团队官网:evasi0n – iOS 6.x Jailbreak

注:文章部分内容转载自CNBETA

更多镜像地址

Server OS Link
box.net Linux SHA1: c9e4b15a161b89f0e412721f471c5f8559b6054f
Mac OS X SHA1: 23f99a0d65e71fd79ff072b227f0ecb176f0ffa8
Windows SHA1: 2ff288e1798b4711020e9dd7f26480e57704d8b2
MEGA Linux SHA1: c9e4b15a161b89f0e412721f471c5f8559b6054f
Mac OS X SHA1: 23f99a0d65e71fd79ff072b227f0ecb176f0ffa8
Windows SHA1: 2ff288e1798b4711020e9dd7f26480e57704d8b2
RapidShare Linux SHA1: c9e4b15a161b89f0e412721f471c5f8559b6054f
Mac OS X SHA1: 23f99a0d65e71fd79ff072b227f0ecb176f0ffa8
Windows SHA1: 2ff288e1798b4711020e9dd7f26480e57704d8b2